The New Outlook

Overview of the New Outlook for Windows
Welcome to the era of enhanced productivity and streamlined communication with the new Outlook for Windows! As your primary hub for all things email, calendar, and contacts, the revamped Outlook introduces an array of innovative features and a modern, simplified design tailored to better fit your needs. Whether you are a long-time user or new to Outlook, this update promises a more intuitive and customizable experience, boosting your efficiency and transforming the way you manage your daily tasks. Join us as we explore what the new Outlook for Windows has to offer and how it can propel you toward success through innovative solutions and endless possibilities.
Key Features and Design Updates
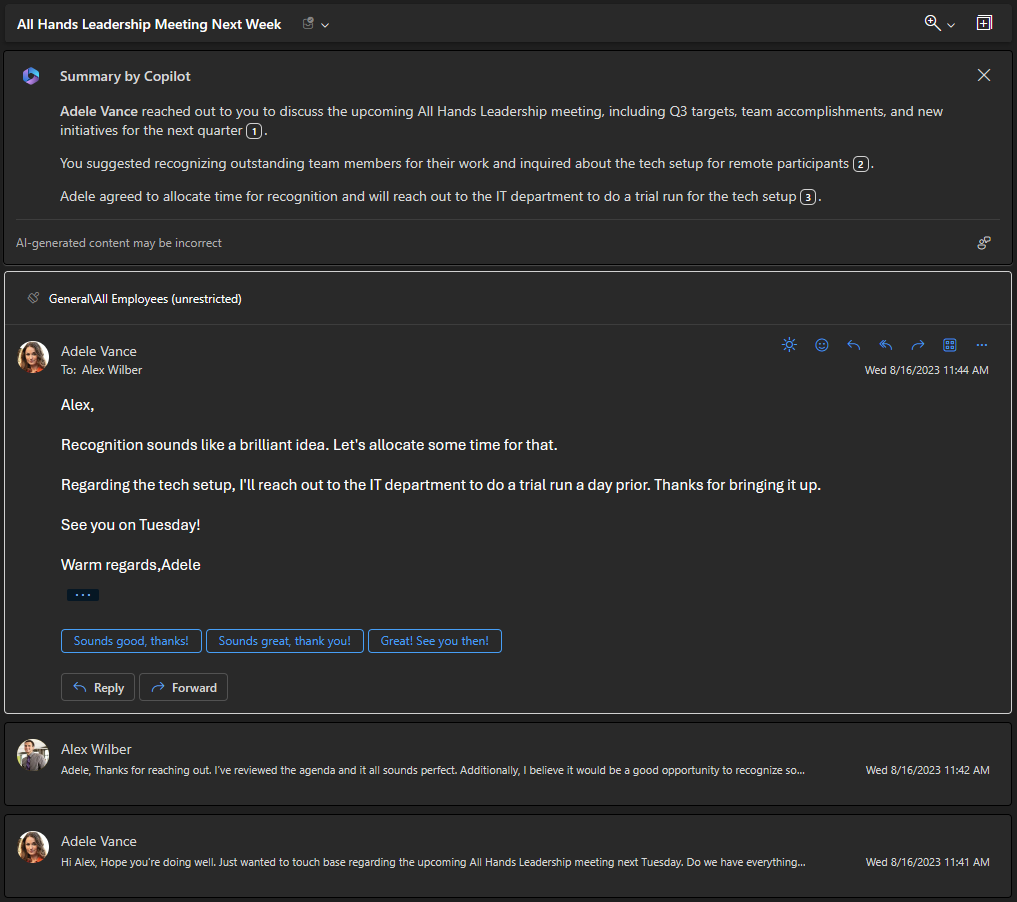
The new Outlook for Windows introduces a modern, streamlined design paired with enhanced features to improve user productivity and customization. This updated version brings forward intelligent assisted capabilities, making it more intuitive for managing emails, calendars, and contacts. Key updates include a simplified ribbon that can be customized to your preference, allowing for a larger or smaller display of options based on your needs. The integration of “My Day” gives users quick access to their daily tasks and calendar events directly from the inbox. Enhanced search capabilities also make finding emails and contacts faster and more efficient.
Supported Accounts and Limitations
The new Outlook for Windows supports a variety of email accounts including Microsoft accounts (Outlook.com, Hotmail.com), work or school accounts, and third-party email providers such as Gmail, Yahoo!, and iCloud via IMAP connection. Most features are available across all supported accounts, providing a seamless experience regardless of the service provider. However, users should be aware of the limited support for public folders; those who rely heavily on public folders may need to continue using the classic Outlook for comprehensive functionality. Additionally, not all features from Outlook on the web or the classic desktop version may be available in the new Outlook, which is still in its preview phase.

Setting Up and Customizing New Outlook
Importing Settings from Classic Outlook
When switching from the classic Outlook to the new Outlook for Windows for the first time, users are prompted with the option to import their settings. This feature aims to smooth the transition by carrying over personalized settings and configurations. It’s advisable to select “Import Settings” during the setup to ensure that your preferences in layout, rules, and signatures are preserved. For those who choose to start fresh, the option to skip this step is available, allowing users to customize their settings manually in the new environment.
Adding and Managing Email Accounts
Adding email accounts to the new Outlook for Windows is straightforward. Users can easily integrate multiple email accounts from supported services by accessing the “Add Account” option located in the settings or directly at the bottom of their folder list. This inclusion ensures that all your emails are managed centrally, whether they are from Microsoft, Google, Yahoo, or other IMAP-enabled email services. Once the accounts are added, they can be managed and customized individually to suit different preferences for a more organized email management experience.
Personalizing User Experience
The new Outlook for Windows offers various personalization options to enhance the user experience. Within the settings, accessible via the gear icon, users can adjust the layout, notification settings, and other preferences. The navigation bar on the left allows for easy switching between mail, calendar, and contact interfaces, while the customizable ribbon provides quick access to frequently used functions. Personalizing the user experience also extends to features like “Snooze Email” and “Pin Emails,” which help manage important messages more effectively. Moreover, with the integration of “My Day,” users can get an overview of their schedule at a glance without leaving their inbox. These personalization features not only cater to individual workflow preferences but also enhance productivity by making important tools and information readily available.
Mastering New Features in New Outlook

Integrating Email and Calendar Management
The new Outlook for Windows revolutionizes how users manage their emails and calendars by integrating both components seamlessly. This integration allows users to effortlessly switch between their email and calendar views without the need for constant navigation adjustments. Efficiency is significantly boosted as you can now handle meeting invitations directly within the email interface, view upcoming appointments, and schedule new ones—all from the same window. By simplifying these essential tasks, the new Outlook empowers users to streamline daily operations and save valuable time.
Using Advanced Email Options like Snooze and Schedule Send
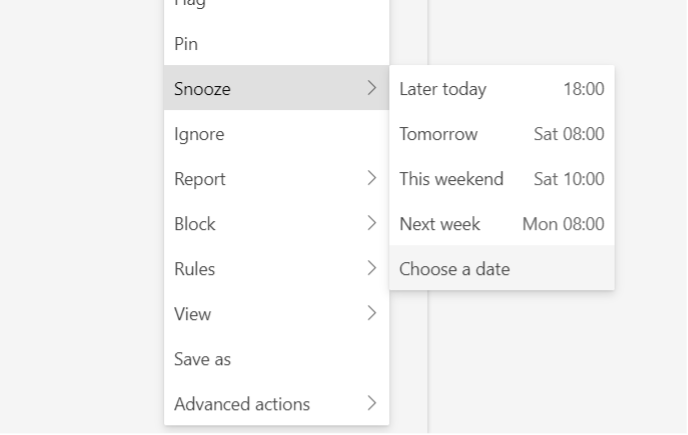
The upgraded version of Outlook introduces advanced email options that enhance user control over their messaging tasks. With the “Snooze” feature, Outlook users can temporarily remove emails from their inbox and set them to reappear at a more convenient time. This function is particularly beneficial for handling less urgent emails without losing track of them. Additionally, the “Schedule Send” feature adds flexibility by allowing users to specify when an email should be delivered, making it easier to manage communications across different time zones or after hours, promoting healthier work-life boundaries and etiquette.
Exploring the Updated Categories and Favorites
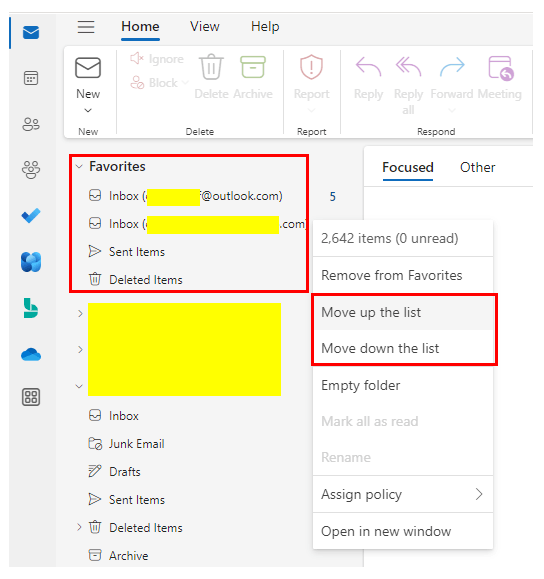
Outlook’s recent update also brings an enhanced organization system with revamped categories and a more accessible Favorites section. Users can now see categories as colored tags directly on emails within their inbox, making specific messages stand out and simplifying the search process. By clicking a category tag on an email, you can filter your inbox to show all messages assigned to that category. Moreover, you can quickly access frequently used folders, contacts, or emails by marking them as Favorites, ensuring these priority items are just a click away at the top of your navigation pane.
Managing Dual Outlook Environments
Switching Between Classic and New Outlook
Managing between the classic and new versions of Outlook is made simple with a toggle feature. Users can switch between interfaces with ease, enabling them to utilize the familiar layout of the classic version or explore the enhanced features of the new Outlook. This toggle not only offers versatility in usage but also assists in gradual transition periods, allowing users to adapt to new features at their own pace without completely abandoning the familiar environment of the classic Outlook.
Using Both Outlook Versions Simultaneously
For those who need features from both the new and classic versions, running Outlook in dual environments is a practical solution. Users can take advantage of the modern interface and functionalities of the new Outlook while retaining access to features that are only available in the classic version, such as certain public folder operations. This dual setup ensures that all needs are met without compromise, providing a comprehensive and tailored user experience.
Feedback and Customization in Dual Setup
A key aspect of using both Outlook versions simultaneously is the ability to provide feedback and customize the experience. Users are encouraged to leave feedback every time they switch from the new to the classic Outlook, contributing to the ongoing development and improvement of the platform. Additionally, personalizing settings in one version reflects across both, thanks to unified settings management. This interconnected feedback and customization mechanism help Microsoft to refine Outlook’s functionalities, aligning them more closely with user needs and preferences.
Future Outlook
The new Outlook for Windows has ushered in a transformative experience for users seeking streamlined workflow and enhanced productivity. With its modern interface, intelligent capabilities, and seamless integration of third-party accounts, it’s clear that Microsoft has taken significant strides toward crafting an email client that not only meets the needs of today’s dynamic professionals but also anticipates the challenges of tomorrow.
In moving forward, it will be intriguing to see the evolution of the new Outlook as it continuously adapts to the changing demands of digital communication. As users, staying informed about the updates and actively engaging with features is crucial for leveraging the full potential of this powerful tool. Microsoft’s iterative feedback approach promises continual enhancements, ensuring that Outlook remains at the cutting edge of email and calendar solutions.
By keeping an adaptive mindset and embracing these innovative changes, we position ourselves to explore new possibilities and achieve greater success. With new Outlook, the future of productivity looks not only promising but also exciting.


